All guide pages
Welcome to DesignerXStudio launcher & favouritesSaving & My DesignsTemplatesExporting & printingShortcuts & everyday toolsDesignChiselLithophaneKeychainClickerMesh BoxBeadsMore tools & pagesTroubleshooting & FAQA flat relief model from your drawing — logos, doodles, signatures and simple artwork.
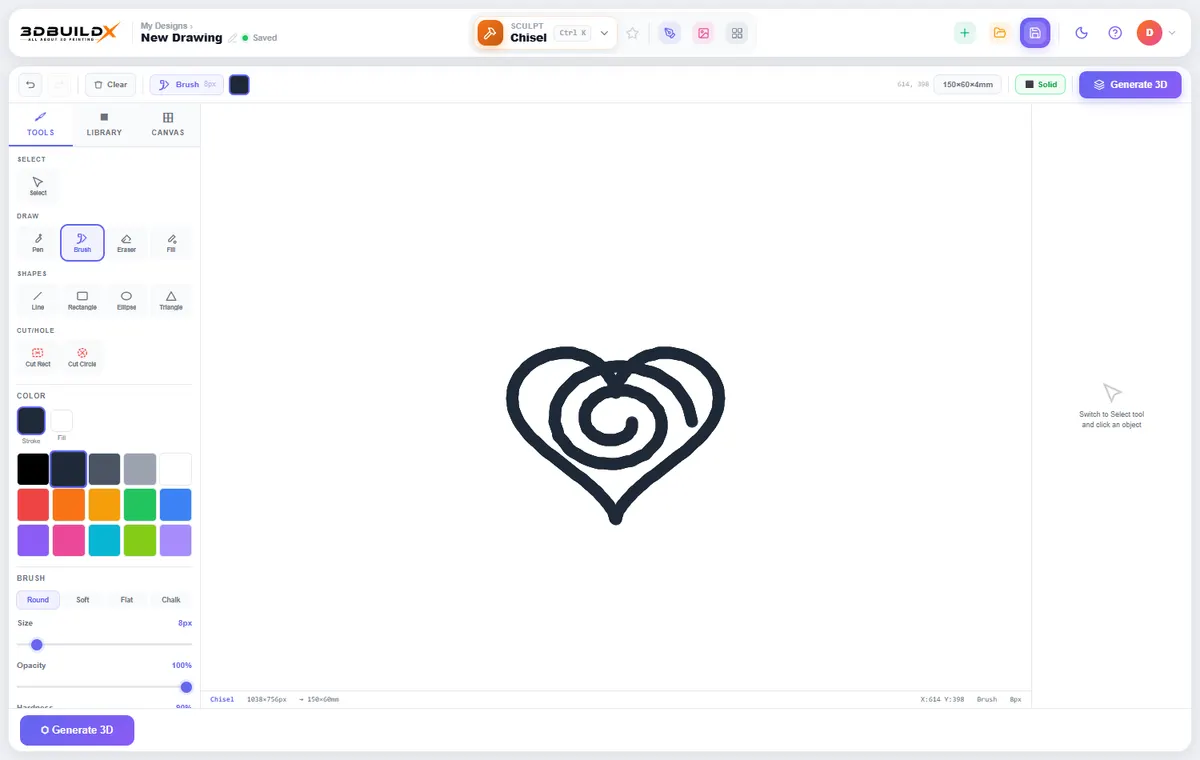
How to use it
- Pick a tool on the Tools tab: Pen, Brush, Eraser, Fill, or a shape (Line, Rectangle, Ellipse, Triangle).
- Choose a colour and, for brushes, the style (Round, Soft, Flat, Chalk), size, opacity and hardness.
- Draw on the canvas. Use Select to move or edit what you drew, and Undo/Redo at the top.
- Use Cut Rect and Cut Circle to punch holes. The Library tab holds ready-made shapes and the Canvas tab sets the size.
- Press Generate 3D to build the model and export it.
What you can do
Brushes
Four brush styles with adjustable size, opacity and hardness, plus a pen for crisp lines.
Shapes & fills
Lines, rectangles, ellipses and triangles with stroke and fill colours, and a fill bucket.
Cut-outs
Rectangle and circle cutters make holes right through the model.
Colours
Colours show in the 3D preview. They may vary a little in print, so check the preview before you slice.
Tips
Chisel works best with bold strokes and strong contrast. Thin lines and tiny details may not convert accurately.
It is an experimental tool — regenerate and compare the preview to your drawing before printing.
Try it yourself
DesignerX is free to use in your browser. Create a free account to save your designs.