All guide pages
Welcome to DesignerXStudio launcher & favouritesSaving & My DesignsTemplatesExporting & printingShortcuts & everyday toolsDesignChiselLithophaneKeychainClickerMesh BoxBeadsMore tools & pagesTroubleshooting & FAQA satisfying desk toy: a cap shaped like your artwork sinks into a base that holds an MX-style keyboard switch.
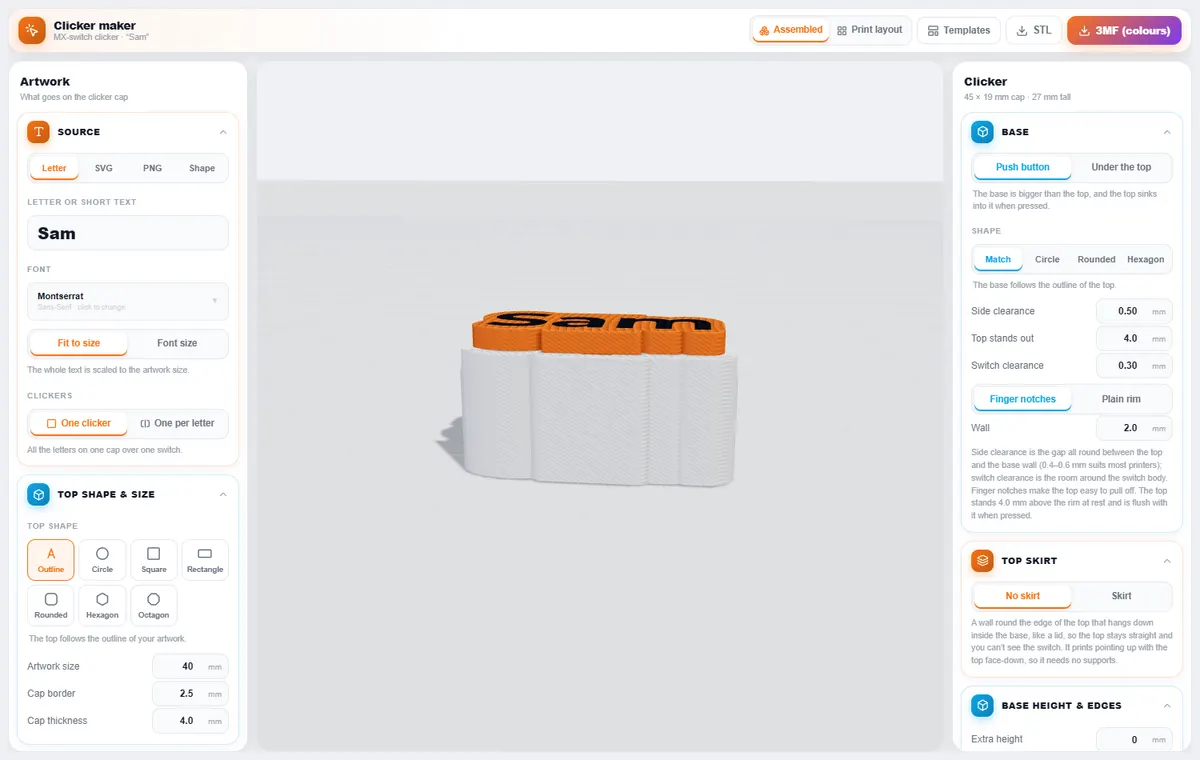
How to use it
- Pick the source for the cap: a Letter/short text, SVG, PNG or Shape. For text choose One clicker or One per letter.
- Choose the top shape (Outline, Circle, Square, Rectangle, Rounded, Hexagon, Octagon) and set the artwork size, cap border and thickness.
- Choose the artwork style: Flush inlay (smooth two-colour face), Raised, or One colour.
- Set up the base: Push button or Under the top, its shape, and the clearances. Finger notches make the top easy to pull off.
- Add an optional skirt, pick colours, then use Assembled / Print layout to check it and export.
What you can do
Clearances
Side clearance is the gap between the top and the base wall (0.4–0.6 mm suits most printers). Switch clearance is the room round the switch body.
Top stands out
How far the top stands above the rim at rest. It is flush with the rim when pressed.
Skirt
A wall round the edge of the top that hangs inside the base, so the top stays straight and you cannot see the switch.
Connectors
Male and female connectors let several clickers link into a chain.
Tips
Print the cap face-down — it needs no supports.
If the top sticks, raise the side clearance; if it wobbles, lower it.
Looking for the overview? See 3D Printed Fidget Clickers (Coming Soon).
Try it yourself
DesignerX is free to use in your browser. Create a free account to save your designs.