All guide pages
Welcome to DesignerXStudio launcher & favouritesSaving & My DesignsTemplatesExporting & printingShortcuts & everyday toolsDesignChiselLithophaneKeychainClickerMesh BoxBeadsMore tools & pagesTroubleshooting & FAQA case shaped like your artwork with a mesh front. You warm the flat printed mesh and press it between the cup and plug tools to stretch it into a dome.
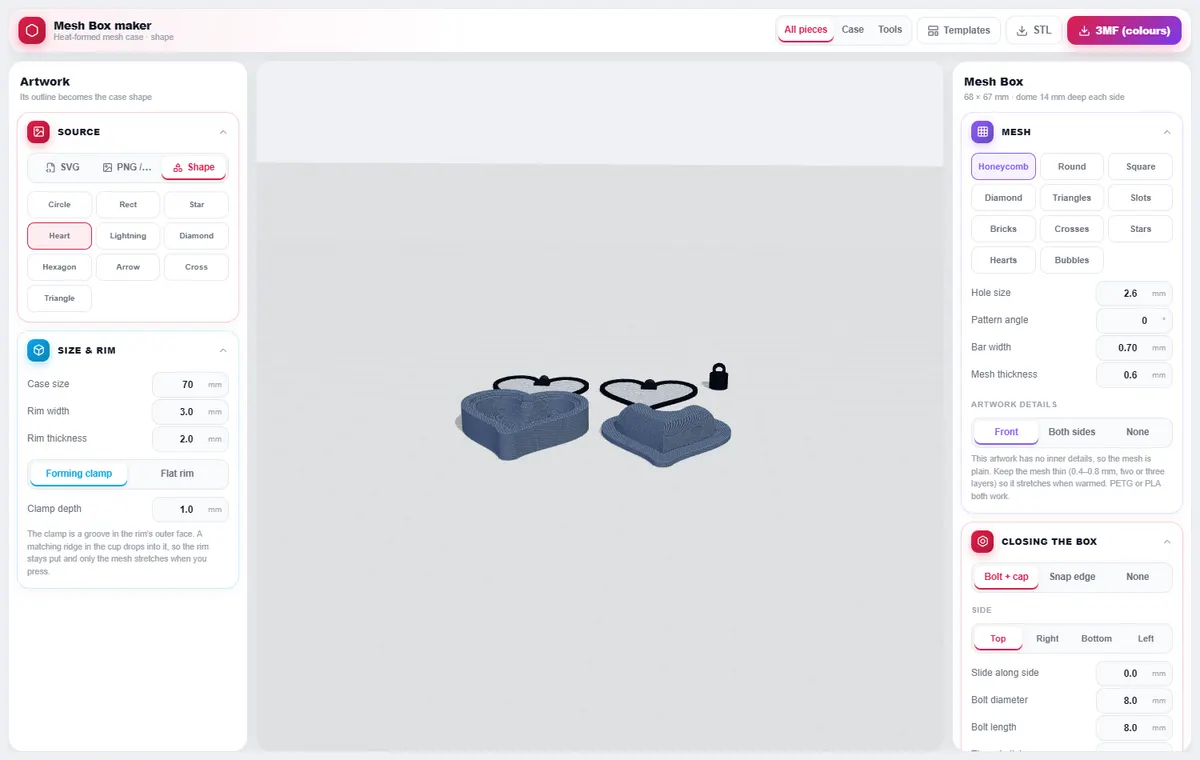
How to use it
- Choose a shape (or SVG/PNG) — its outline is the case.
- Pick a mesh pattern (11 to choose from), hole size, bar width, angle and mesh thickness.
- Set the case size and rim. A forming clamp groove locks the rim into the tool so only the mesh stretches.
- Choose how it closes: a Snap edge (a barbed tongue and a groove), any number of bolts + caps, C-shaped clips, or a folding hinge that prints both halves as one piece.
- Set the pressing depth of the forming tools, then print everything flat.
- Warm the mesh with a heat gun, press it between the cup and plug, and fit the halves together.
What you can do
Mesh
Honeycomb, round, square, diamond, triangles, slots, bricks, crosses, stars, hearts and bubbles. The mesh starts evenly at the border and any piece not attached to it is dropped.
Artwork details
Inner details of an SVG/PNG can appear on the front, both sides or none, and be solid, meshed (their own colour with mesh inside, so they still stretch when heat-formed) or just an outline.
Artwork on a shape
With a plain shape, add an SVG or PNG/JPG on top of it: flush in the mesh, on top (raised), meshed or outline, with its own size, position and colour.
Snap edge
Barbed (clicks) or plain ridge tongue, with adjustable height and fit clearance. Both halves print without supports.
Bolts + caps
Up to 6 bolts spaced evenly round the box, starting at any angle (Top, Bottom, Left, Right or any degree), with adjustable diameter, length, pitch and clearance. One cap per bolt.
Clips
Up to 8 C-shaped clips that push over both rims. Each sits in a pocket and clicks into a slot so it can’t slide or fall off. Width, grip depth, thickness and clearance are adjustable.
Folding hinge
Prints both halves as one connected piece joined by a thin strip at any angle. Choose a V-groove (a small V cut at the fold, leaving a thin web so it creases cleanly), Ties (several narrow grooved strips) or a flat strip. Width, fold gap, thickness and web are adjustable, and the forming cup and plug get a matching channel so the strip passes through.
Forming clamp
The groove that locks the rim into the tool: set its depth, width and clearance.
Hanging ear
An optional ear with a hole for a chain or lanyard, on any side.
Pressing depth
Up to 100 mm for tall domes. Deeper tools take longer to build.
Views
All pieces, Case or Tools to inspect each part.
Tips
Print the mesh thin (0.4–0.8 mm) in PETG or PLA so it stretches when warmed.
If the halves are too tight, raise the fit clearance; if loose, lower it.
Looking for the overview? See 3D Printed Mesh & Candy Boxes (Coming Soon).
Try it yourself
DesignerX is free to use in your browser. Create a free account to save your designs.